I’ve embarked down the road of document and image conservation, the physical preservation of photographs and historical media. This involves conversion to digital format, and then from the master image created, adding suitable metadata, so source, age, attribution, description, keywords and so forth for archiving. And then building a further better quality image or images more suited to the intended purpose.
Imaging tools have become more adept at these tasks, made possible in part by adoption of AI to things like metadata generation and cleaning up images. However AI is a double edged sword at the moment which while unquestionably adding value to some tasks, is causing issues with others. I’m in the camp of supporting tools that make the job better, rather than being an outright AI supporter. Lets take a look at how its going.
First image capture from either old prints, negatives or slides. Old prints can either be colour or black and white, all in any type of condition from well preserved to very damaged. The ones sitting in a shoe box under the bed, typically the former. The ones glued into an old unloved album, the latter. If they can be separated to the individual print then flatbed scanning is an option. I have a better method now using a home made table scanner which I have written about here. This is much easier on old images and documents, faster to setup and does a really good job. The flatbed scanner is now yesterdays news.
If on the other hand they are glued into an album there could be damage. The print itself could be wrinkled or otherwise damaged. It may not be possible to separate the page from the album, although with a table scanner this is less an issue that it is for a flatbed scanner. While it is important to make a digital copy it may not be possible to repair the image if there is too much damage.
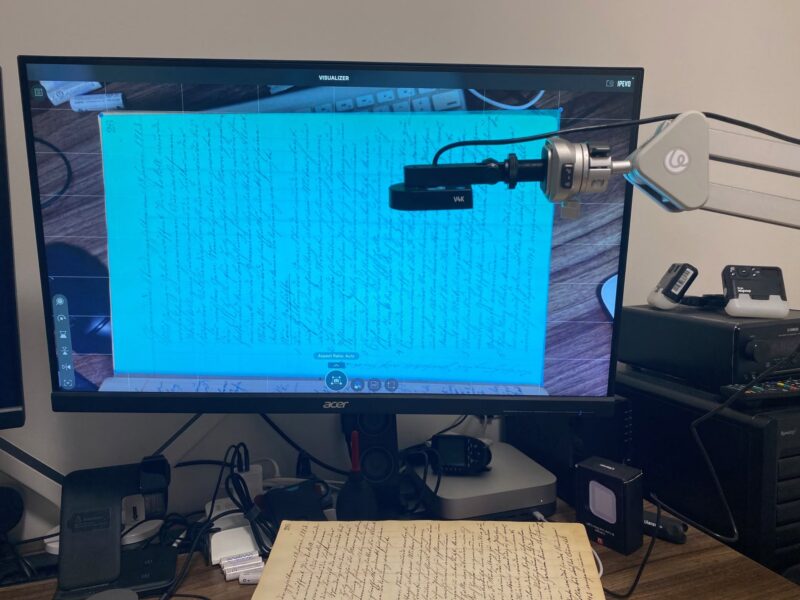
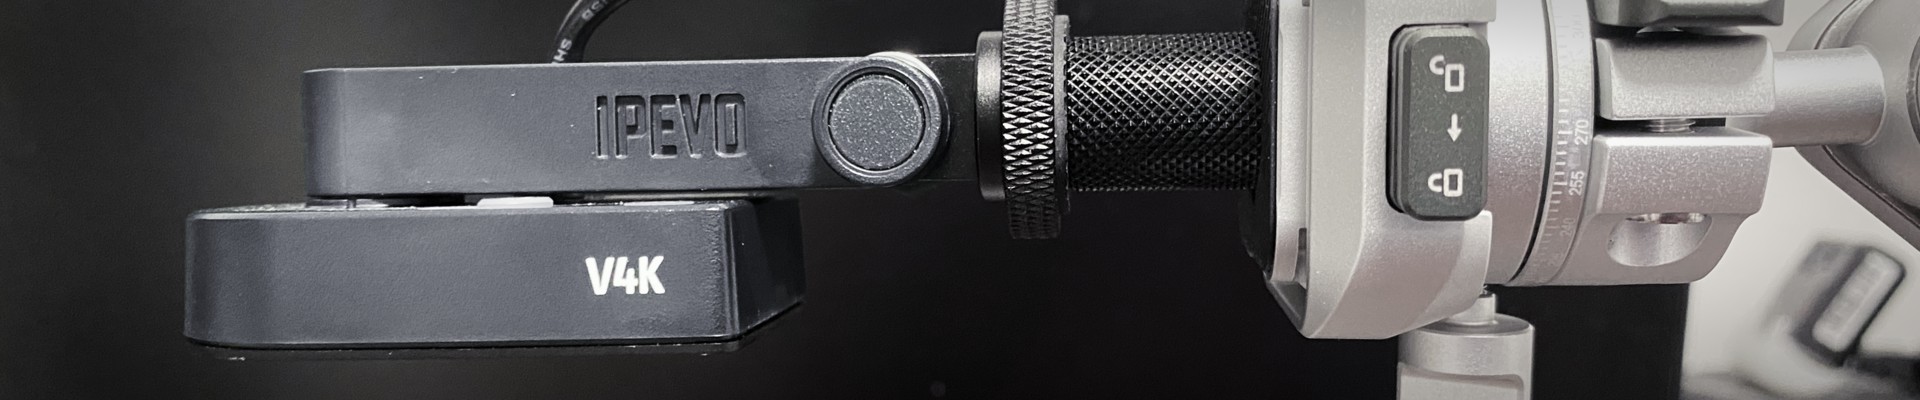
The table scanner in action, here shown scanning a document from a book. The software can correct for keystoning which is a good feature for ensuring the scan edges are square, however with old documents and manual print production methods back in the day, nothing is square.
Slides and negatives are digitised with a slide scanner. The digitising process requires the media to be inserted into a carrier which in turn is inserted into the scanner. Old negatives and slides can be in very poor condition and a decision needs to be take whether to attempt a careful cleaning before scanning, or not. I prefer to clean them as a last resort, and at least to take a scan first to see how badly affected the image might be. I am not a professional conservator and the intent is to prepare the collection for the state library. There people trained in this work can then deal with it properly.
Below an example of a transparency slide about 65 years old which had been living in the bottom of a drawer for most of its life. It had accumulated a decent level of damage, some of which could likely have been removed with cleaning. After scanning I ran it through some software to see how much work might be required to sort it out. In days gone by, Photoshop would have been employed to remove defects and make corrections. Now however much of the work is handled by software alone powered by AI for better or worse.
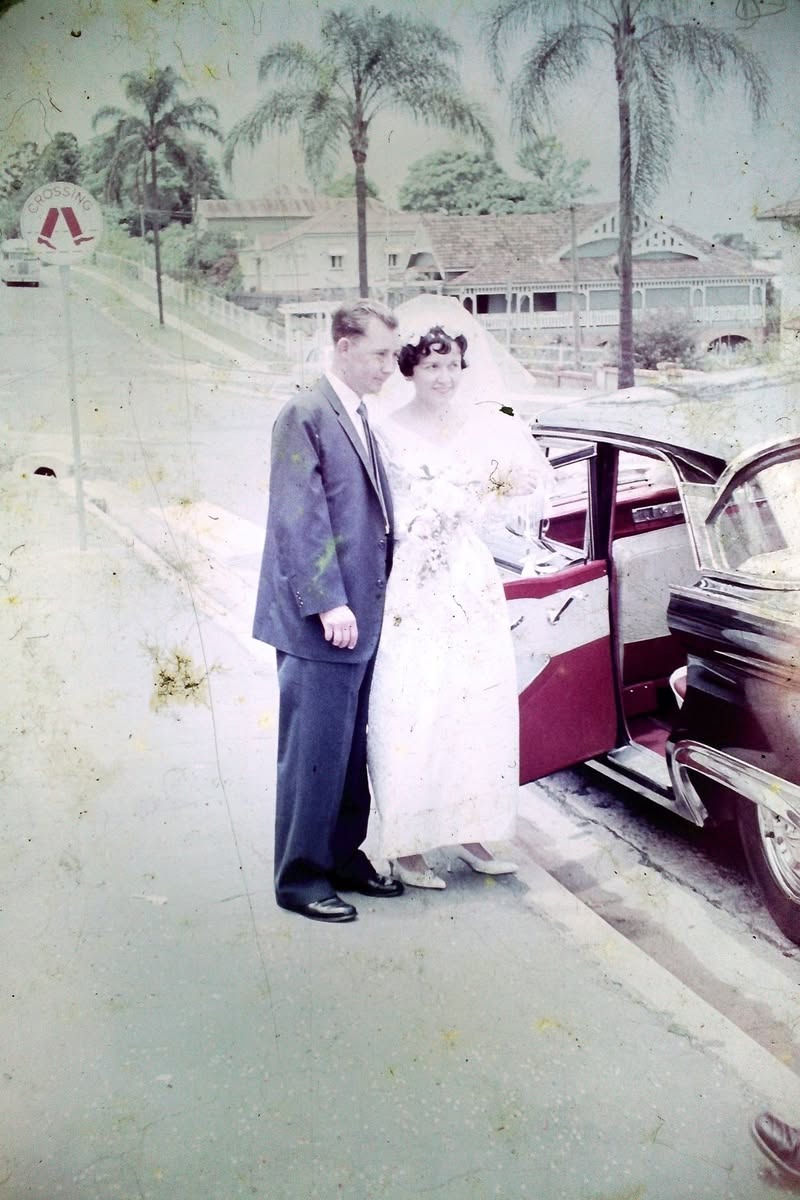
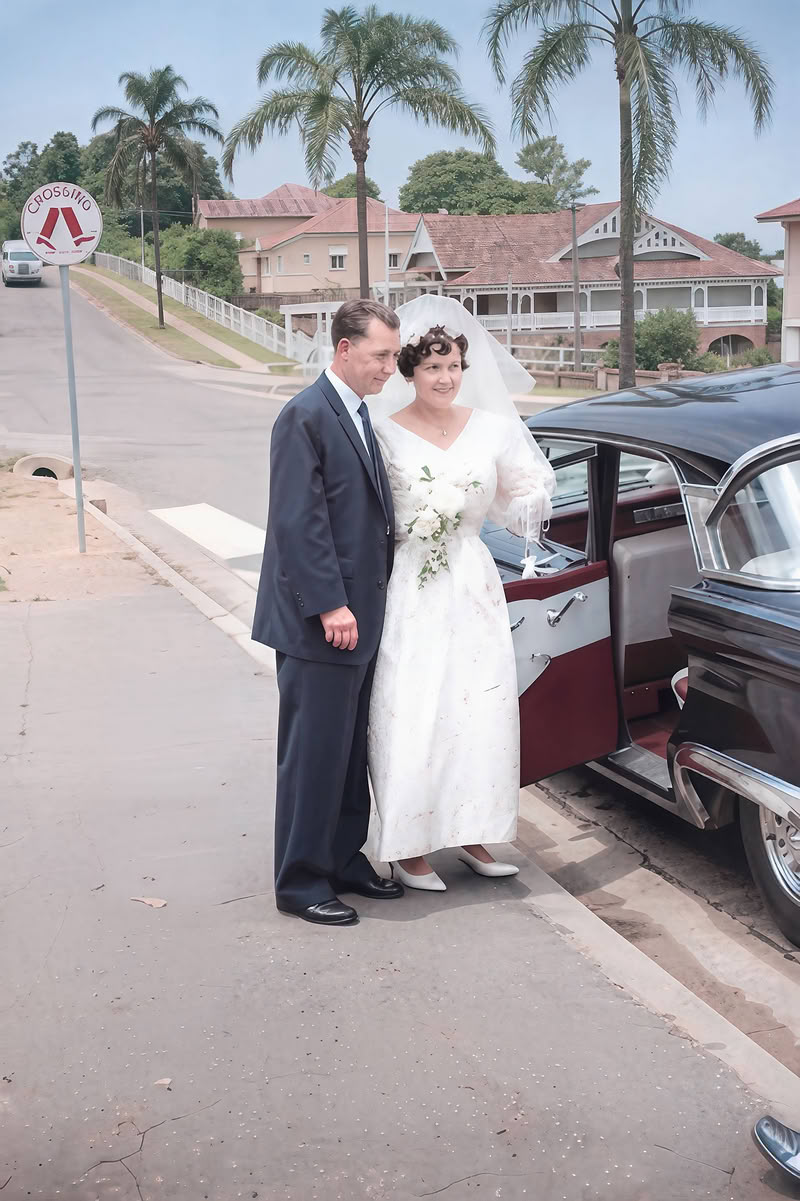
On the left, the initial scan. On the right one pass with the AI tool and no manual intervention, about two minutes work. This seems fantastic, and it is, but its not infallible. Like all tools it needs some understanding of how it works in order to maximise the result without heading off into the world in AI induced defects. It can for example totally mangle faces and hallucinate in other ways if a light touch is not used.
I am going to say though it’s done a spectacular job of removing the fungus and other defects on the transparency and the colour correction. I was quite satisfied with this one.
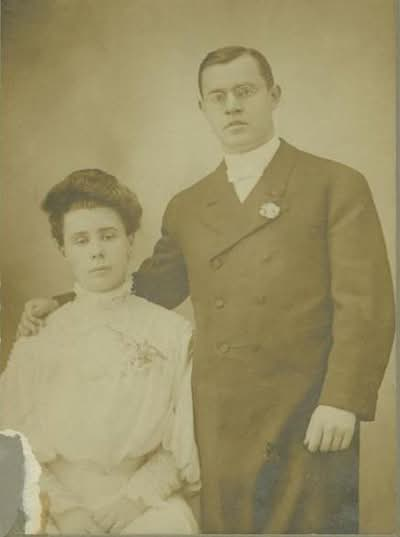
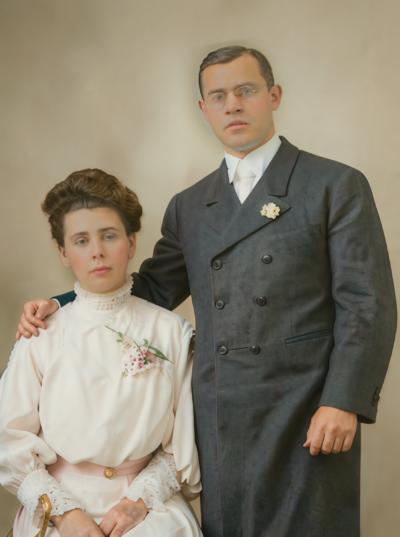
Above a further example where the lower left corner is repaired, rebuilt by AI. A close inspection shows the bow tie has been replaced with a regular tie, something easily fixed but this too was done in one pass. Faces are quite well preserved, but there is an artifact above the head on the restored image where I dialed the face restoration way down and it’s preserved a bit of the background. But for a single pass, its very impressive.
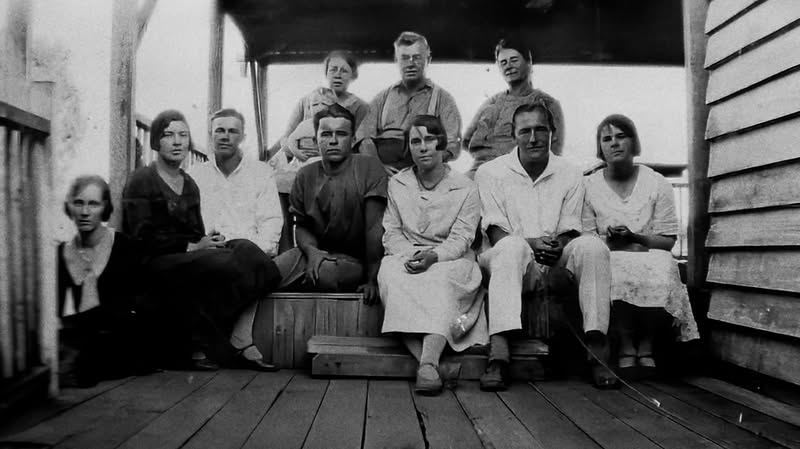
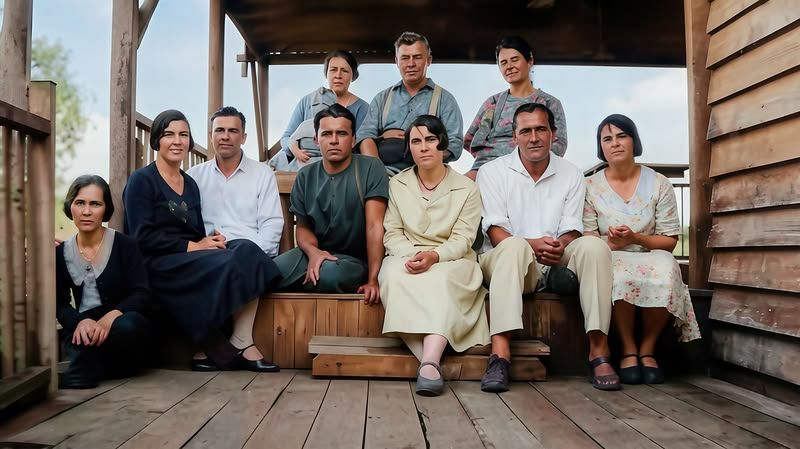
Here an example of where it didn’t go well for a couple of reasons. The original image was not great and lacked clarity and detail. In turn the restore program did its best and somewhat mangled the faces, the so called “zombie faces”. I’ve tried to wind the face recovery back, but this is an example of trying to do something without enough information to start with. So herein the learning, there is a limit and if anything is going to suffer it will be the faces. Bearing in mind though this image was small and blurry, this is not terrible.
In particular glasses have been removed and for reasons I am unsure about, there is a child with what appears to be a bag on their head. If anyone knows what that is about, please do let me know. I got a few results like this initially while learning how to use the tool. In general though, good results are achievable starting with a decent digital image from the original scan and a light hand with the restore tool. It’s just amazing how much can be accomplished quite easily now, compared to a few years back when all this required manual adjustment with something like Photoshop.